
With cPanel, you can install your WordPress Website by just a clicking of button.
It is a very good things to have that features and you can save a lot of times by cPanel control panel WordPress installation.
But some hosting provider does not provide you cPanel, or your control panel doesnot have a wordpress one-click installation.
You can install your WordPress Manually.
Here is a step by step instruction of manual installing of WordPress. There is a Prerequisites in this manual.
- You have File Manager in your control panel
- You have a standard database like MySQL
- You already have a web hosting space and yourexampledomain.com pointed to this web space
The Six Main Steps of Manually installation
1. Download zip files from the WordPress website https://wordpress.org/download/;
2. Upload your ZIP file to your html folder by file manager;
3. Extract Your ZIP file in your html folder by your file manager;
4. Create a database and username for your WordPress website;
5. Configure WordPress to connect to the newly-created database
6. Complete the installation and setup your new WordPress website!
Step #1 – Down WordPress Files to Your Local Computer
Download WordPress zip files (wordpress-version.zip) from the WordPress website https://wordpress.org/download/
Step #2 – Upload WordPress Zip Files to Your Domain Html Directory
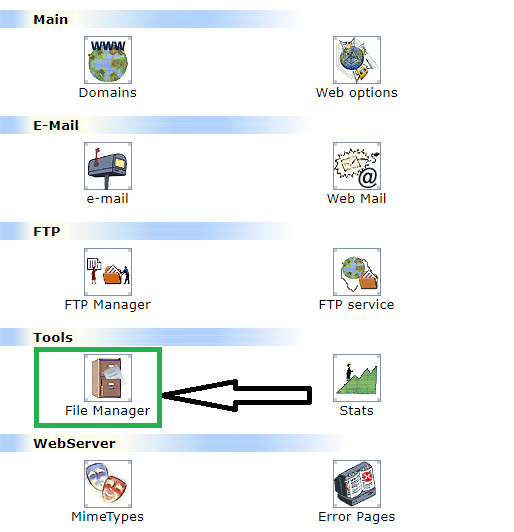
You need go to your web hosting control panel (All web hosting providers provide it ) , and locate your file manger.
Click to WordPress Web Hositng from $7.47 per month
Go to your html file home directory.
If you are using cpanel, it is public-html, if you are using plesk control panel, the html home directory is httpdocs, ixwebhosting html file home directory is just under your domain name.
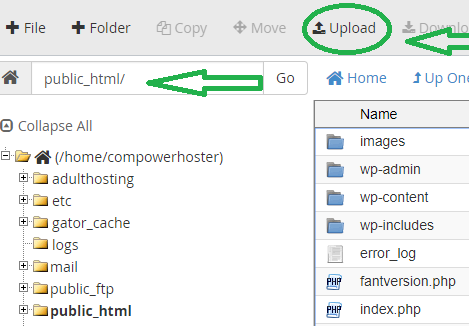
Upload files in Cpanel

Upload Files in Plesk
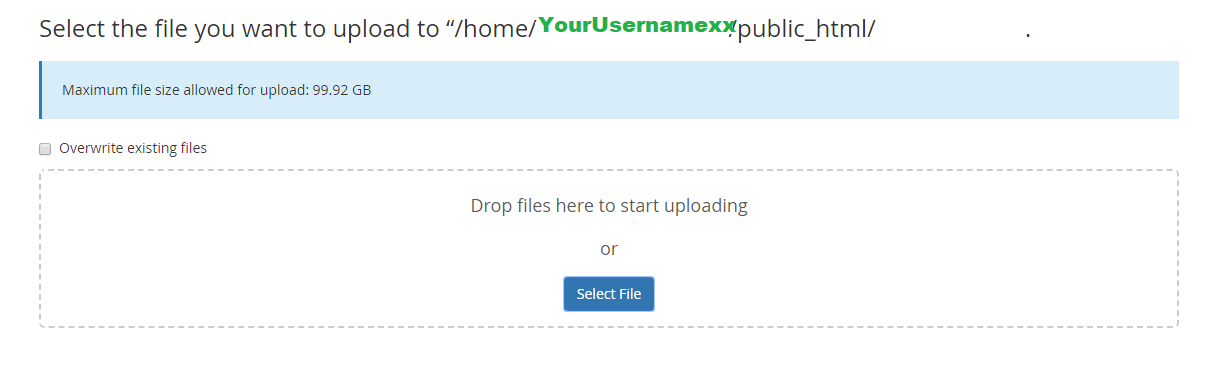
Upload your WordPress zip files (wordpress-version.zip) into your html home directory.
The wordpress-version.zip will be in your html directory now.
Step #3 – Extract WordPress ZIP Files
Highlight WordPress ZIP file and click extract.

The file manager will pop up:
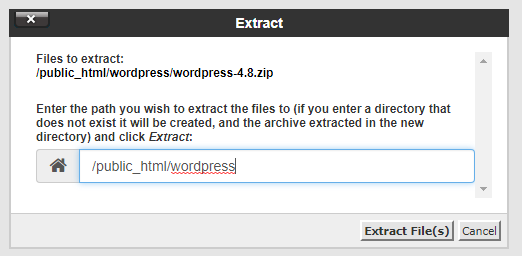
Click Extract Files and you will get it extracted very fast. The results pop UP:
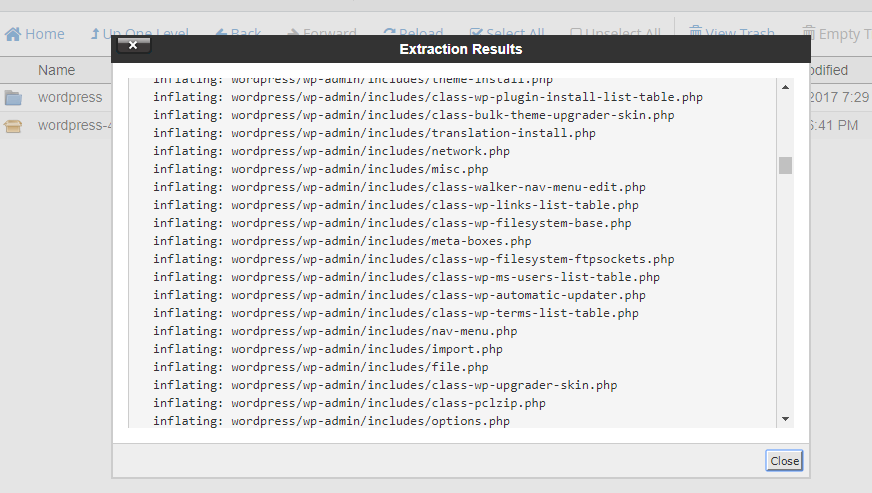
Right now, all your WordPress files are located in your public_html/wordpress folder.
What you need do is to highlight all files and move them to your html file home directory.
Step #4 – Create a database and username for your WordPress website
all web hosting control panel allow you to create a database and username.
what you need do is to assign your username to your created database.
For how to create database and MYSQL username, please check following article. HOW TO CREATE A DATABASE AND MYSQL USERS ?
Now you get your database and your MYSQL username to use for your php application.
Your database name: yourdatabase
Your username: yourusername
Your password: yourpassword
MYSQL Hostname: localhost
(if your MYSQL Hostname is not local host, the web hosting provider will provide you hostname. eg mysqlhost.secureserverphp.net )
You will go to next step to configuration your config.php file